Configuring and testing high speed wireless internet access via a mesh network
When DSL was the fastest internet access available it was often enough to have one router in the house that would send a signal to all rooms which was still strong enough to transmit the 5-10 Mbps provided by your internet service provider (ISP). Now that fiber optics gives speeds between 50-500 Mbps it is much harder to transport this high velocity to all corners of the house, unless it’s a small space.
In this post I want to quickly run through setting up high speed wireless internet access around your place using multiple access points (APs), all with the same network name (SSID) to create one mesh network. Also I will go through some tools that are helpful for measuring it works.
 Image from nytimes.com
You will need a main router, which usually is the device provided by your ISP. It is a combination of modem, router and switch. It provides the internet connection to your home, routes traffic from devices inside your local network and distributes IP addresses dynamically for devices in your house using DHCP. Since the signal from this router will most likely not reach all corners of your house with high speeds you need to install additional APs around the house. Ideally the access points are connected to your main router via cable. Cat6 cable would be a good choice. It is faster and isolates better against interferences than older Cat versions.
For access points you can use old routers. I am using an old EE Broadband router as one of my access points. The access point should have DHCP turned off, since the IP is now provided by the main router. You can assign the AP an IP that is not already used by the other APs, usually something in the range of 192.168.1-10.
Keep in mind that for higher speeds the router should support 5GHz. Usually these are dual band routers which broadcast in 5GHz and 2.4GHz simultaneously. 2.4GHz is the older version and supported by protocols like 802.11b/g/n, while 5GHz uses 802.11c. 5GHz allows for fast speeds of 1.300 Mbps and more while 2.4GHz often doesn’t surpass 150 Mbps. The downside of 5GHz is that the signal doesn’t reach as far and is easier blocked by walls and other obstacles. Also not yet all devices support 5GHz. E.g. the new Apple Watch 2 only supports 802.11g/n, which is why it’s good to have a network broadcast both bands at the same time.
The router and all access points on 2.4GHz and 5GHz should have the same SSID and password, ideally using the same encryption standard for the password, WPA2-Personal. This way you only have to add the network to your device once and then your device can roam between access points.
How to see which access point you are connected to?
Since your device will always be connected to the same network name (SSID), but different access points it is hard to tell from the normal wifi interface of your smartphone/tablet or laptop which access point you are connected to.
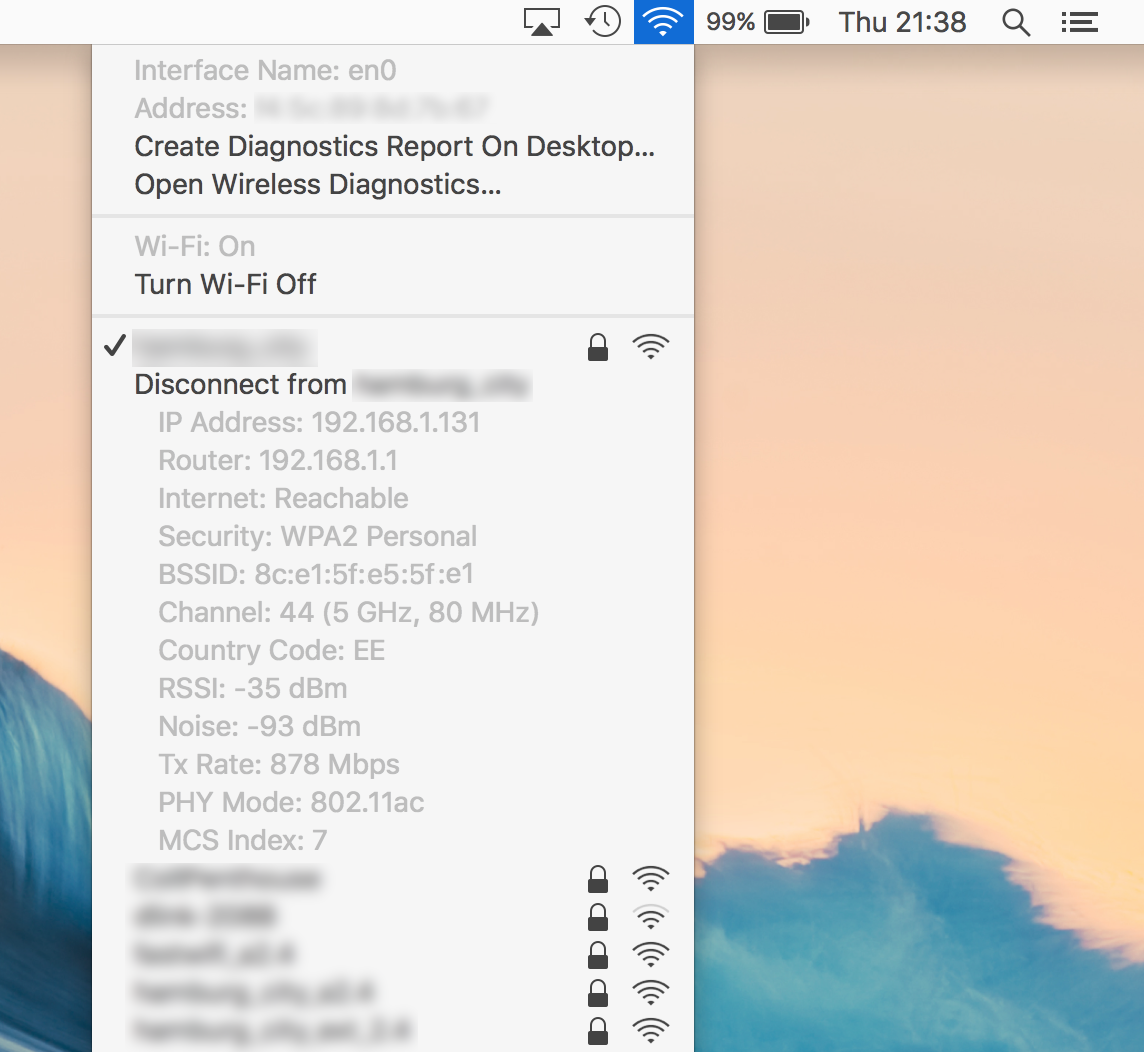
The access points you are connected to can be identified by the MAC address or BSSID, an identifier unique to each device. Press the alt key and click on the wifi symbol on your Mac on the top right corner of your screen. The Mac address you see here should be noted on your AccessPoint and can also be seen by logging in to your access point/router from your local network.
How to measure signal strength on a Mac?
Another way on an Apple to see the MAC address and also list all your access points and surrounding WiFis is to use the Wireless Diagnostics tool which comes with your Mac. It can usually be found in/System/Library/CoreServices/Applications or you can just search for “Wireless Diagnostics” using Spotlight.
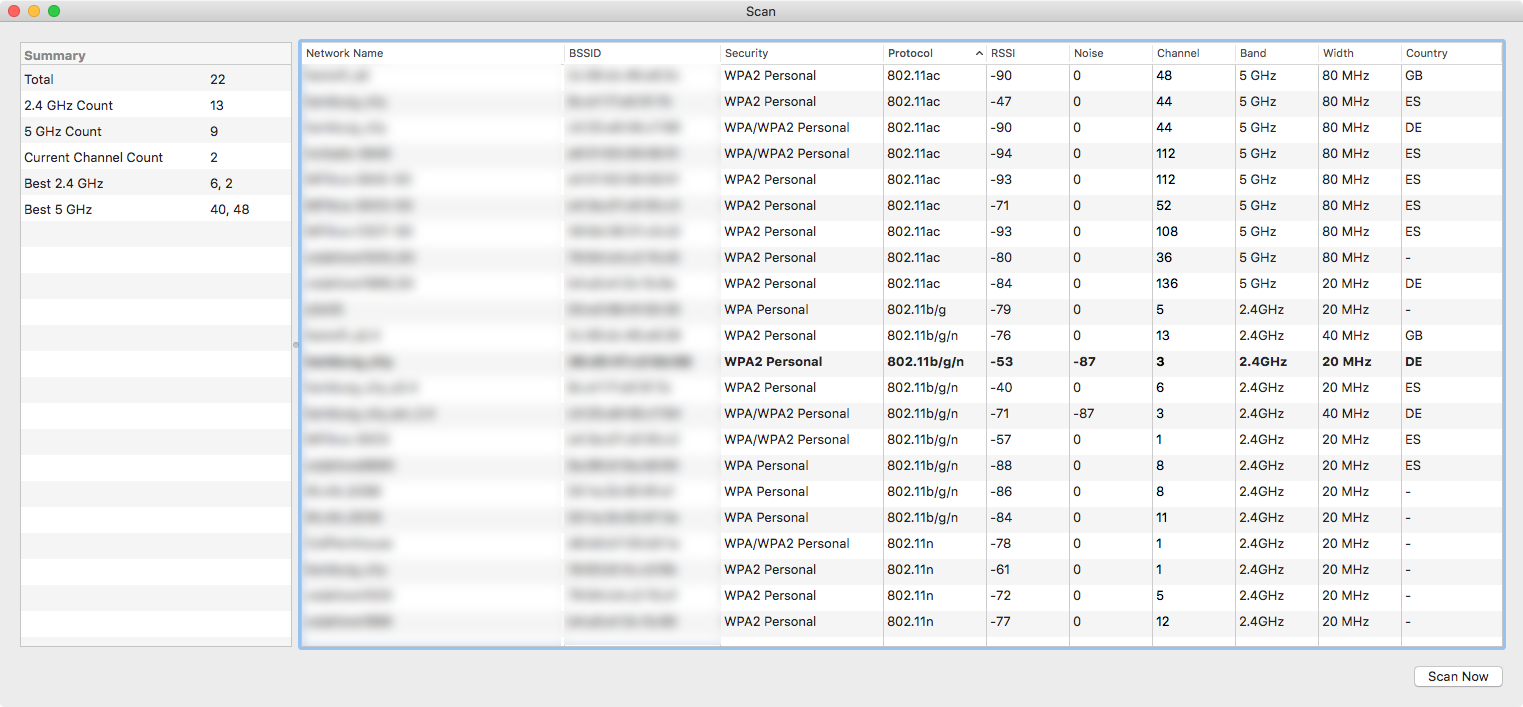
Once you are in Wireless Diagnostics I recommend going to Window and opening Scan, Performance and Info. Info shows you details about the current AP your are connected to. Scan will list all WiFis with a signal reaching your Mac. It lists the protocol they use (usually 802.11b/g/n or 802.11ac), the BSSID (i.e. the MAC address) as well as the channel and the Band (2.4GHz or 5GHz) and width.
The Performance window is of particular interest as it allows us to measure signal strength. It shows the signal and the noise as well as the rate. The signal (or RSSI) is measured in decibels from 0 (zero) to -120 . It should be as close to 0 as possible, so -40 is a stronger signal than -80. For the noise it’s the other way around. The closer it is to -120 the better since we want to have as little interference to our signal as possible. Interference tends to come from things like Microwaves, Bluetooth devices and other radios.
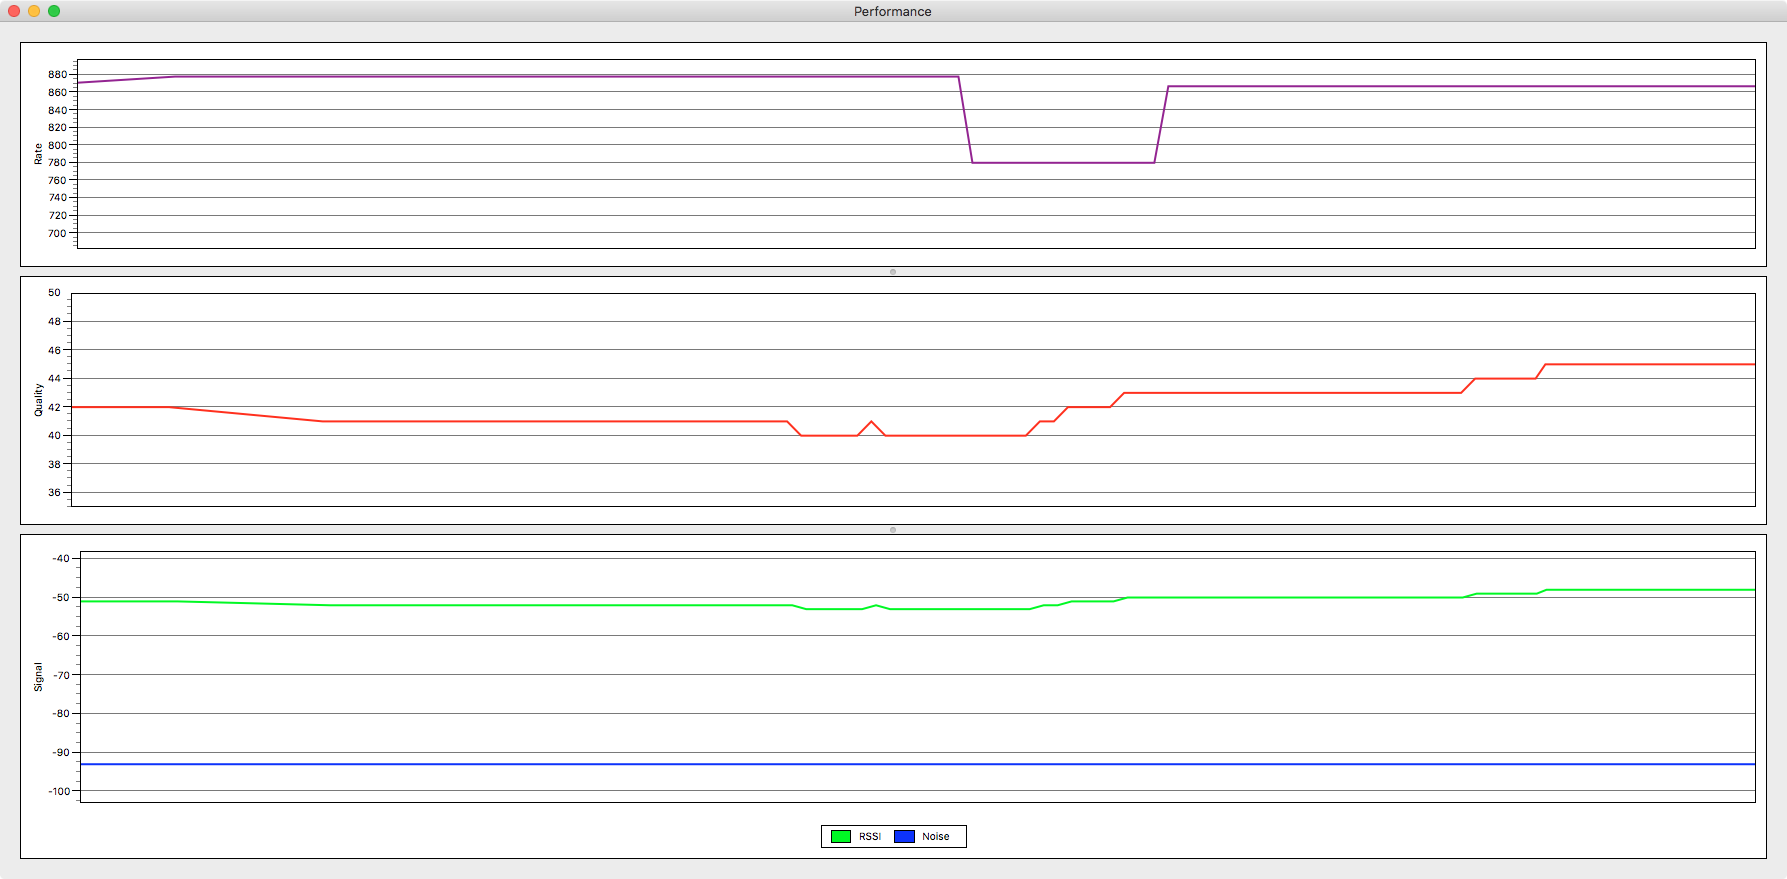
The pink graph on top shows the rate. The tx rate shows the speed with which data can be transferred between your device and access point. Bear in mind that this is not the actual internet speed. You might have a rate of 800 Mbps to your AP, but the internet speed provided by your ISP is only 200 Mbps then your ISP will be the limiting factor. At the same time to be able to take advantage of the high velocity your ISP permits the access point can be a bottle neck if your house has access to 300 Mbps internet speeds, but your AP only transmits at 100 Mbps.
This is why in order to enjoy internet speeds of over 100 Mbps you want to be close to a 802.11ac access point with a good signal broadcasting on 5GHz at a 80Mhz band.
How to measure actual internet speed?
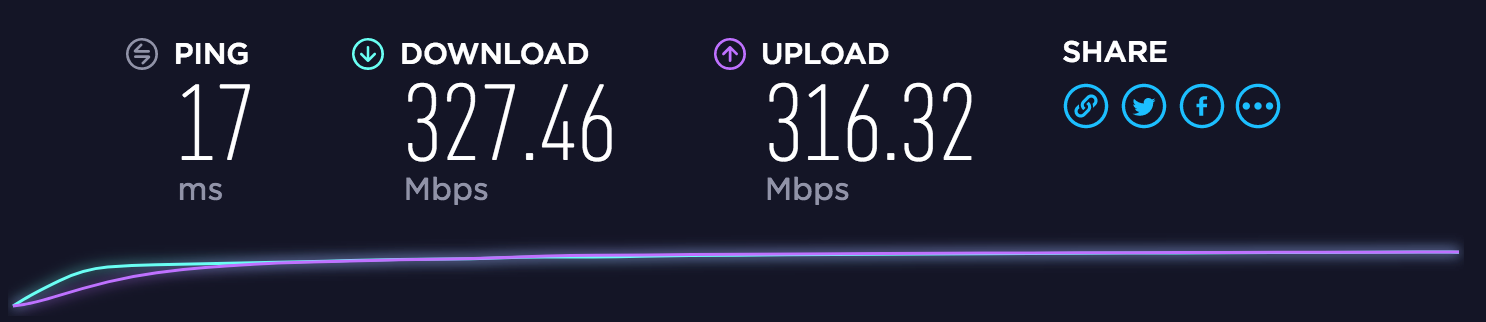
The above is useful when it comes to configuring, optimizing and fixing your local network. However at the end of the day, unless you want to make use of local network traffic, you will mainly care about how fast the internet is on your actual device. In order to do that you should test your internet connection with a speed testing tool like fast.com or speedtest.net. The download and upload rates are important, but at least as important is the ping, which should be well below 50ms to allow for good audio/video call quality and a good gaming experience without delays to the server or lagging voice.
Roaming behavior largely depends on your device
The roaming behavior is different for each device. Ideally it connects to the strongest signal and that changes while you move between access points.
iOS works pretty well when it comes to AP switching while my MacBook is a bit slow to change. It’s possible to change the way your Mac computer connects to AccessPoints from the command line.
Set to strongest: sudo /System/Library/PrivateFrameworks/Apple80211.framework/Versions/A/Resources/airport prefs joinMode=Strongest
What solutions are out there if I want to configure as little as possible by myself?
Pre-built solutions for building your own mesh network with high speed internet access around the house exist: Check out Eero, UniFi, Google Wifi or Asus Lyra for example. They are usually easier to configure, but more costly than just hooking up routers and access points manually. Also they can be helpful when you can’t install cables to connect routers and access points, but want to connect everything wirelessly.